
Data Management – Salesforce

Data Management
When conducting data manipulation operations on a bulk of data, you need the help of a dedicated tool to speed up the process. Data Loader is one of the most popular Salesforce-authorized tools used for this task.
Data loader allows you to process a maximum of 5 million records. You can perform insert, update, upsert (insert and update), delete, hard delete, export, and export all operations on data within this limit. In the case of export and import operations, the tool uses CSV file format to deal with data by default.
Previous article, Roles in Salesforce, Roles.
Working with Data Loader on Salesforce starts with downloading and installing the tool. If you search for “Data Loader” on the Quick Find box, it’ll take you to a page with links and guides to help with the installation on your device.

After installing the Data Loader on your device, you’ll find options that allow you to carry out different DML tasks once you open the app.

Let’s first see how to export data from Salesforce with the help of Data Loader.
Read more: What are Page layouts in Salesforce and how to create Page layouts?
Start the process by clicking on the Export button and choosing the environment to download data from (Production or Sandbox).
It prompts you to log into Salesforce with your credentials.

Next, choose the objects you want to export and provide the export location.

Read more: Validation rules in salesforce.
You can also select the list of fields to export under each object. It also allows you to filter records based on certain filter conditions.
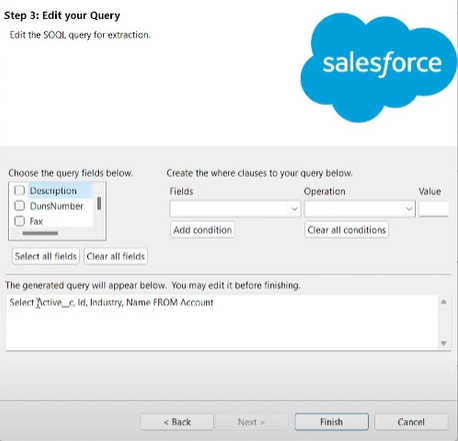
The end of the export process saves the CSV file with data to the provided location.
Read more about formula fields in Salesforce. This tutorial covers everything you need to know to master formula fields and enhance your Salesforce expertise.
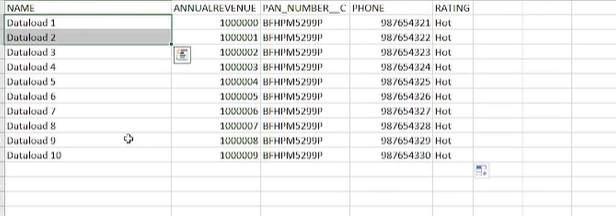
Similarly, to conduct an insert operation, you can select the Insert option on the Data Loader app. Pick the object corresponding to new data and provide the location of the CSV file containing data for the new records.
Read more: SOQL Query in Salesforce

Make sure to populate all the mandatory fields of the object in this insert file.
Read more: record types in Salesforce.
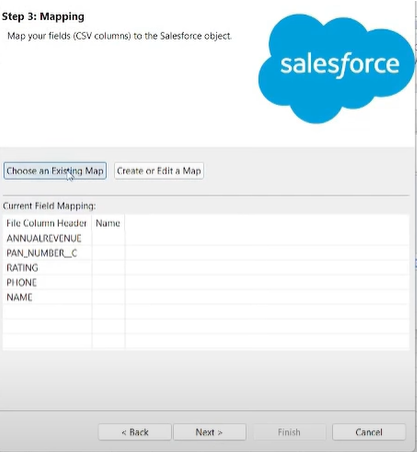
Next, you have to create a mapping between the field names in the CSV file and the object’s fields.
Read more: String methods in Salesforce apex
If such a mapping already exists, you can use that file instead of creating one anew.

Read: Latest important Salesforce interview questions and answers.
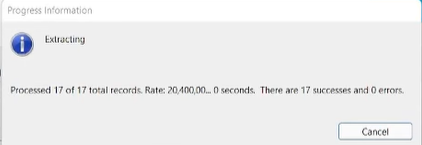
Once this process is completed, you can check the Salesforce org to check whether new data appears in the object table.

You can try working with update, upsert, and other operations through the Data Loader in a similar manner.
Read more: SOSL in Salesforce
Next article, Classic Email templates in Salesforce explains about Classic Email Templates.
Read our Free tutorials on Salesforce Admin, Developer(Apex) and LWC.

