Picklist and Multi-Select Picklist
Topics Covered in This Tutorial
Overview of Topics
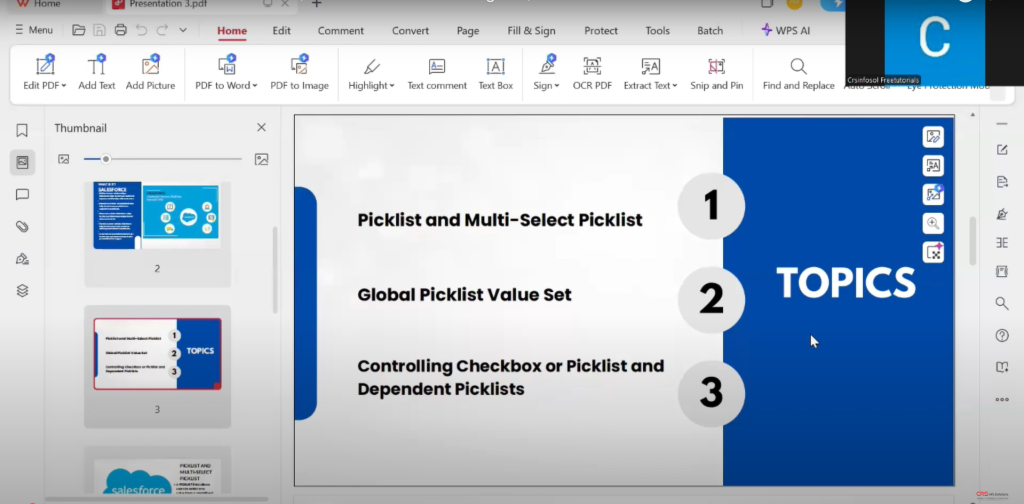
This slide introduces the core topics that will be covered in the tutorial:
- Picklist and Multi-Select Picklist — Learn the basic difference between these two field types.
- Global Picklist Value Set — A centralized value set that can be reused across multiple fields.
- Controlling Checkbox or Picklist and Dependent Picklist — Master how to link fields together for dynamic user input control.
Watch Full Video here:
This roadmap helps the learner understand what to expect and how these concepts interrelate.
Picklist and Multi-Select Picklist Definition
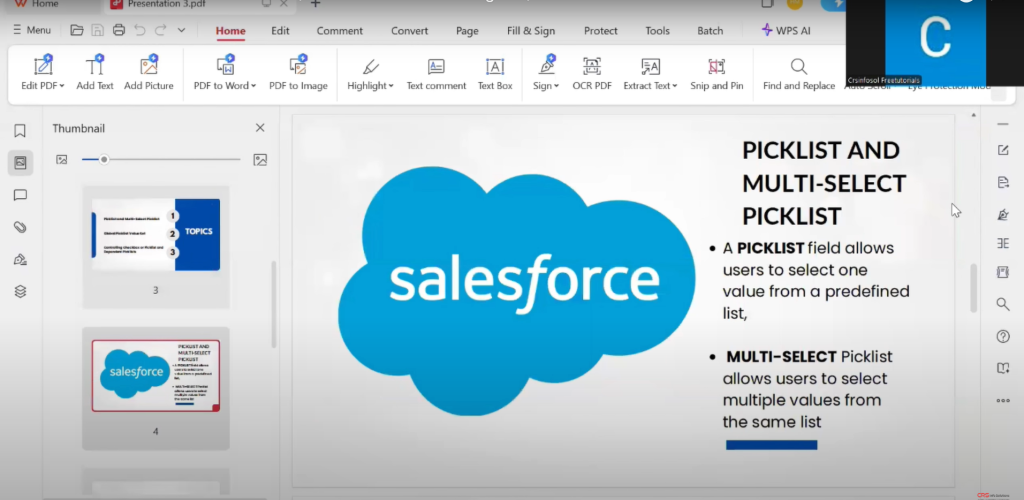
This slide clearly explains the basic concepts:
- Picklist allows the user to choose a single value from a predefined list.
- Multi-Select Picklist lets users choose multiple values from the same list.
This distinction is essential because the choice depends on business needs — whether only one selection should be allowed or multiple.
Navigating to the Object
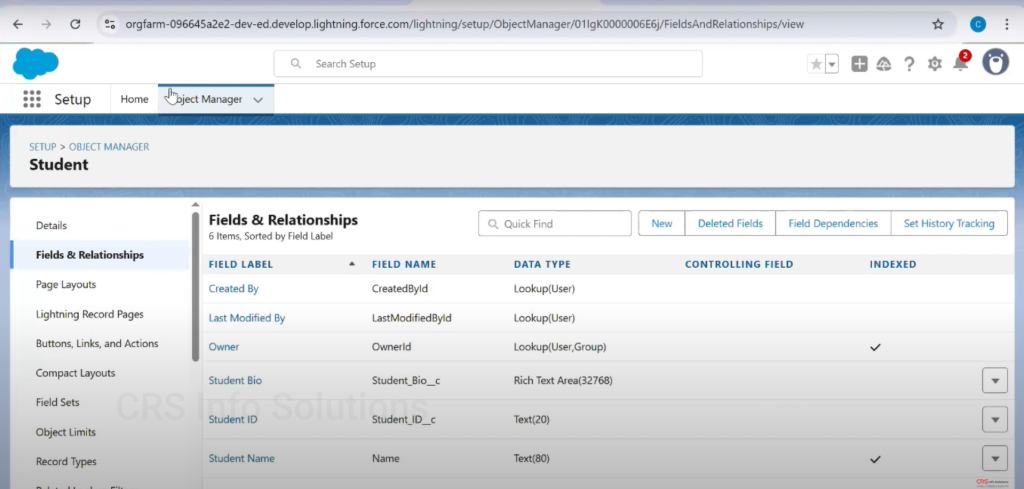
Here we are inside Salesforce Setup, under Object Manager, looking at the Student custom object. This is where all the fields related to the Student object are managed. The left panel shows navigation options like Fields & Relationships, Page Layouts, etc.
This is your entry point for creating new custom fields like Picklist or Multi-Select Picklist.
Accessing Setup Menu
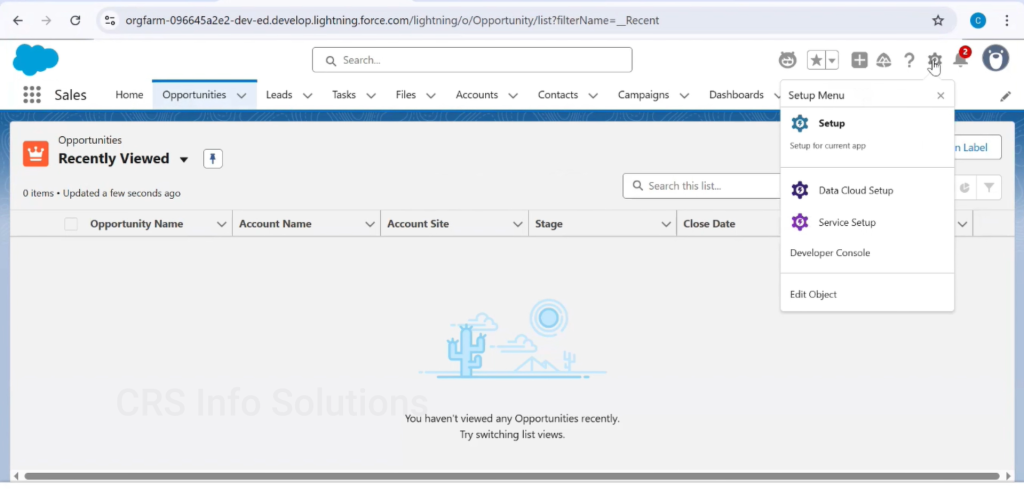
To reach the Object Manager, you first click the gear icon in the top right corner and select Setup. From Setup, you can manage all configurations including objects, fields, automations, and more.
A crucial step in any customization task in Salesforce.
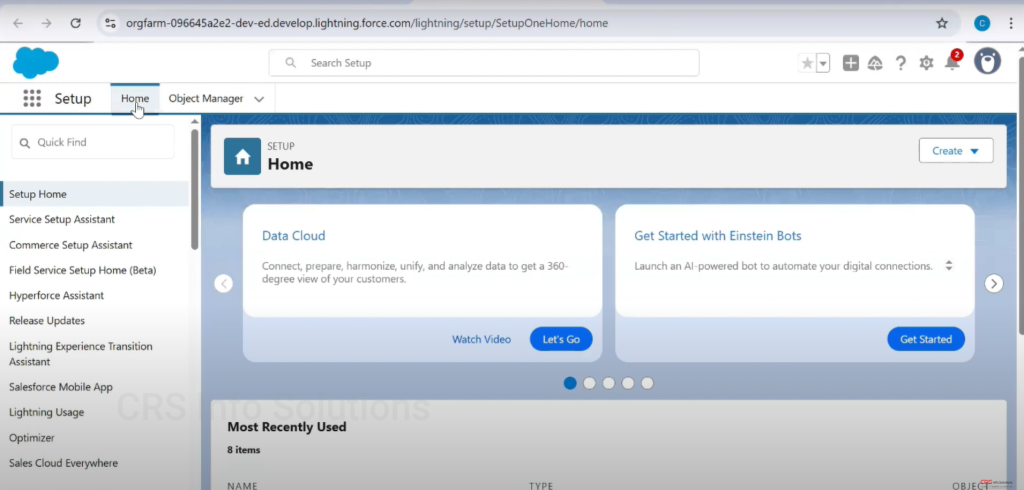
Setup Home Page
This is the Setup Home Page, where you can access different assistants and tools like Data Cloud, Einstein Bots, etc. This area provides a central hub to start any customization or administrative task.
From here, we’ll be moving to Object Manager to manage fields.
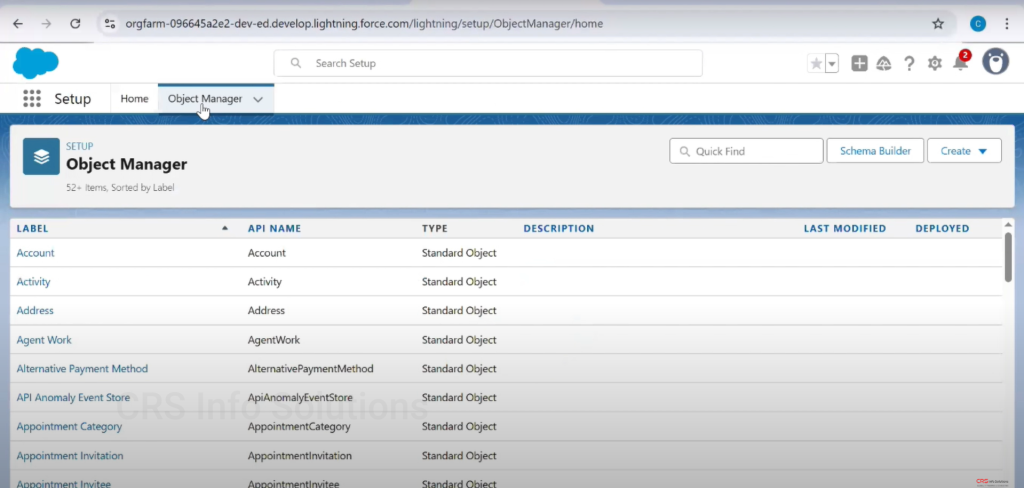
Object Manager — List of Objects
The Object Manager lists all standard and custom objects available in the org. In this screenshot, you can see standard objects like Account, Activity, Address, etc.
To work on our Student object, we will locate and click it from this list.
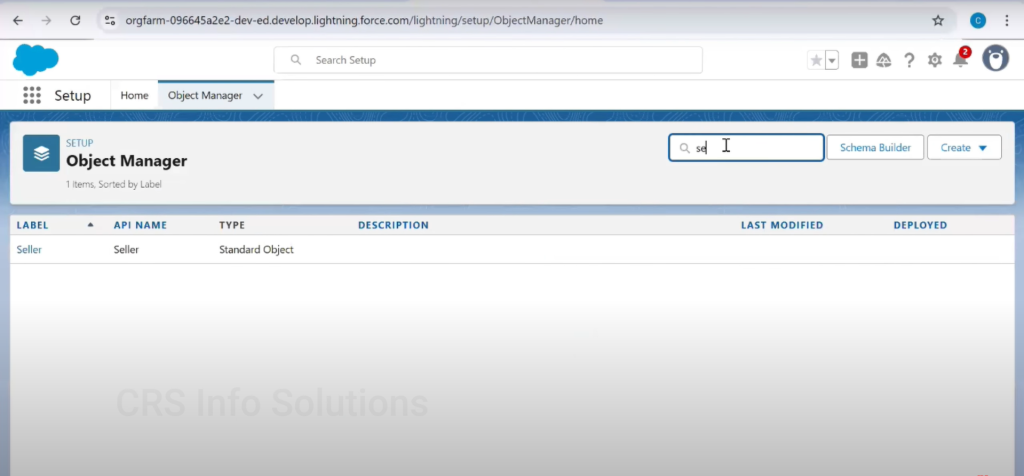
Searching for a Specific Object
If you have many objects, use the Quick Find search bar to type the name of the object — in this case, “Seller.” This feature saves time and helps you instantly find the object you want to customize.
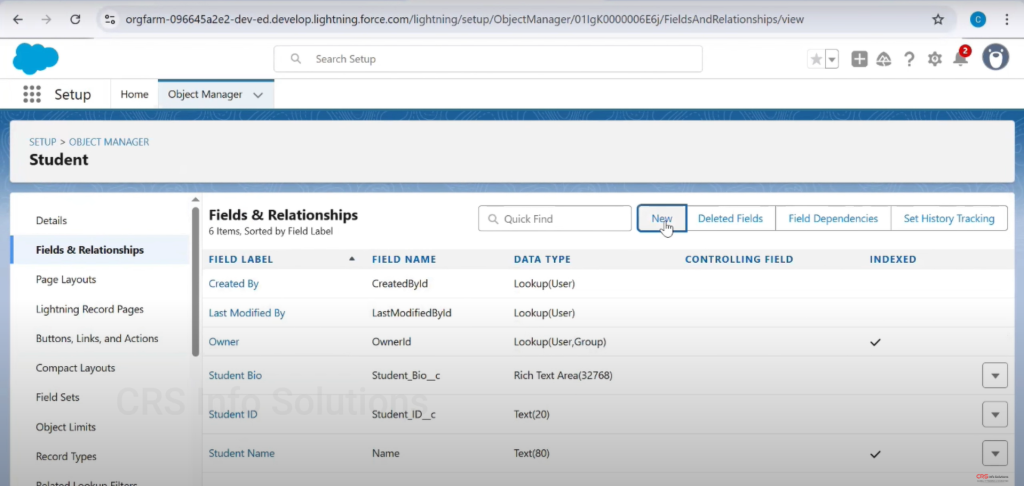
Adding a New Field
We’re now inside the Fields & Relationships section of the Student object. Clicking the “New” button allows you to start creating a new field.
Here is where we begin the process to create a Picklist or Multi-Select Picklist field.

Choosing Field Type
This screen is Step 1 in creating a new custom field. Here, Salesforce prompts you to choose the Data Type. Scroll through and select either:
- Picklist (for single value selection), or
- Picklist (Multi-Select) (for allowing multiple values).
Click Next after selecting your desired type to proceed with field configuration.
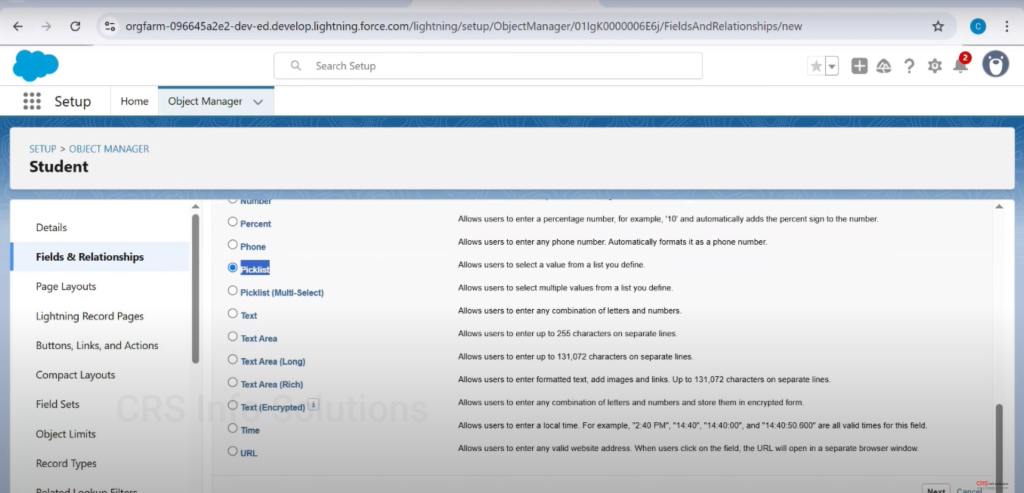
Highlighting Picklist Options
This close-up view highlights the Picklist and Multi-Select Picklist options with brief descriptions:
- Picklist: “Allows users to select a value from a list you define.”
- Picklist (Multi-Select): “Allows users to select multiple values from a list you define.”
It’s important to choose the right type based on your business requirement — use Multi-Select only if more than one choice must be saved in the same field.
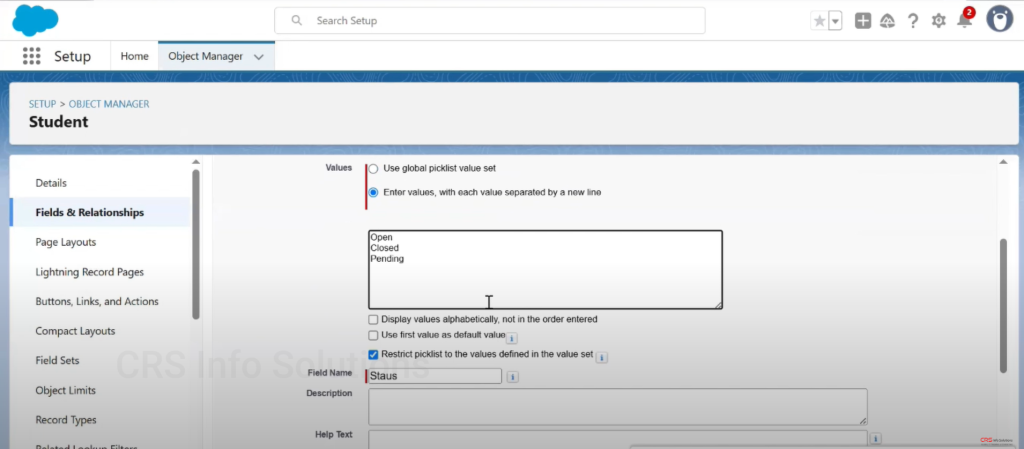
Defining Picklist Values
In this step, we define the actual values for the Picklist field. We’ve selected “Enter values” manually instead of using a global picklist value set. The values entered are:
- Open
- Closed
- Pending
Additional options include:
- Sorting alphabetically
- Setting the first value as the default
- Restricting users to the listed values
This manual setup gives you full control over the field values relevant to your custom object (here: Status field on Student object).
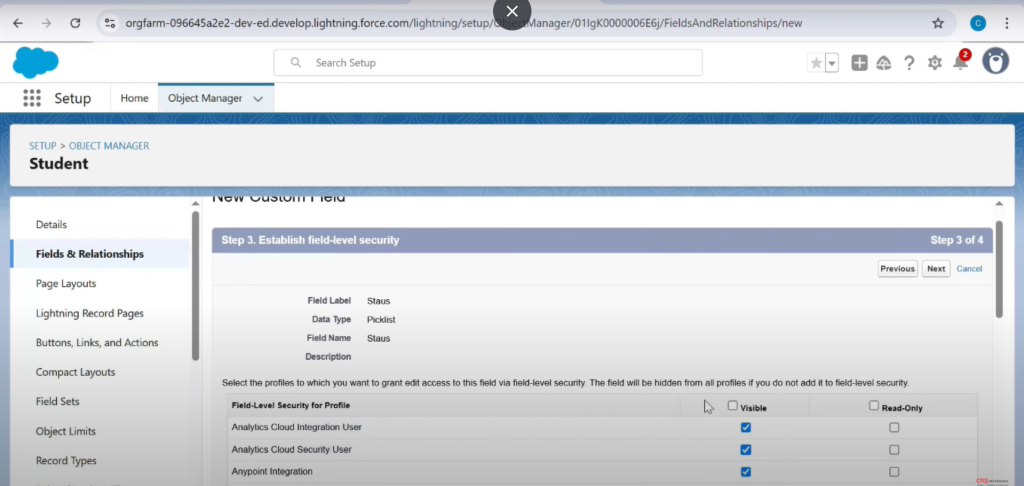
Field-Level Security Configuration
Here we’re at Step 3: Field-Level Security, where you define visibility and edit access of the field based on user profiles.
You can make the field:
- Visible: Users can see it.
- Read-Only: Users can see but not edit.
This ensures that only authorized users can modify the “Status” field, complying with internal data governance.
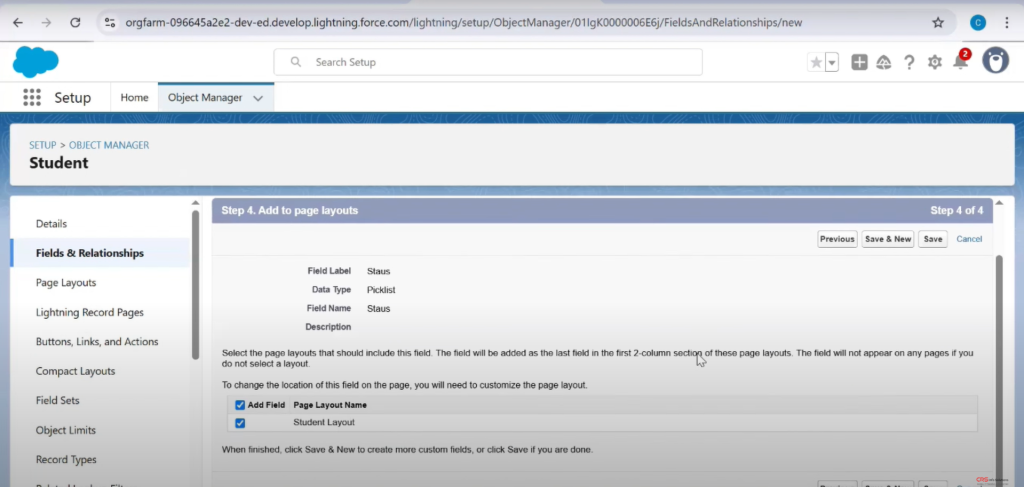
Add Field to Page Layout
At Step 4, we’re selecting which Page Layouts should include this new field. The checkbox “Add Field” ensures that the Status field will appear on the layout named Student Layout.
This is crucial so that users can interact with this field directly on record detail pages.
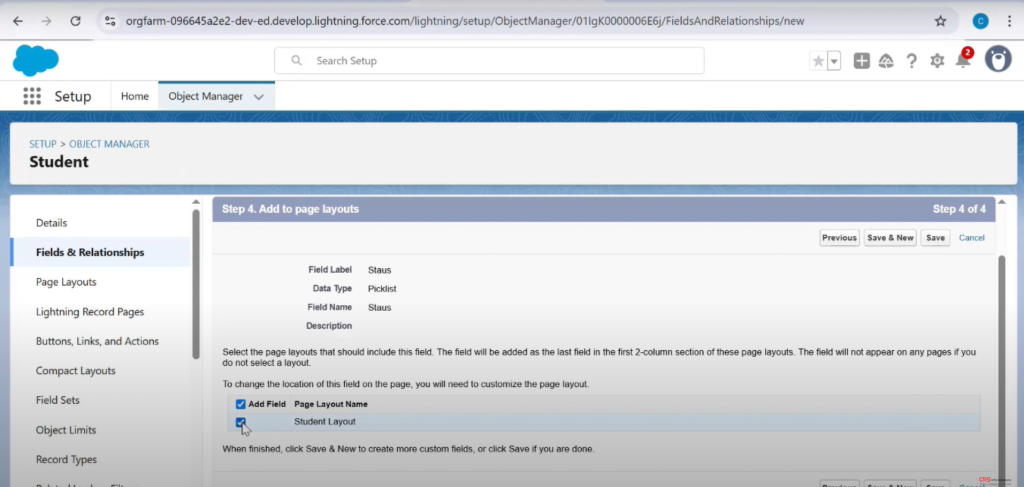
Confirming Layout Assignment
This image shows a final confirmation where the layout checkbox is ticked for Student Layout. Once this is saved, the field will appear in the UI.
Don’t forget: if the field is not added to any layout, it won’t be visible to users even if it’s created!
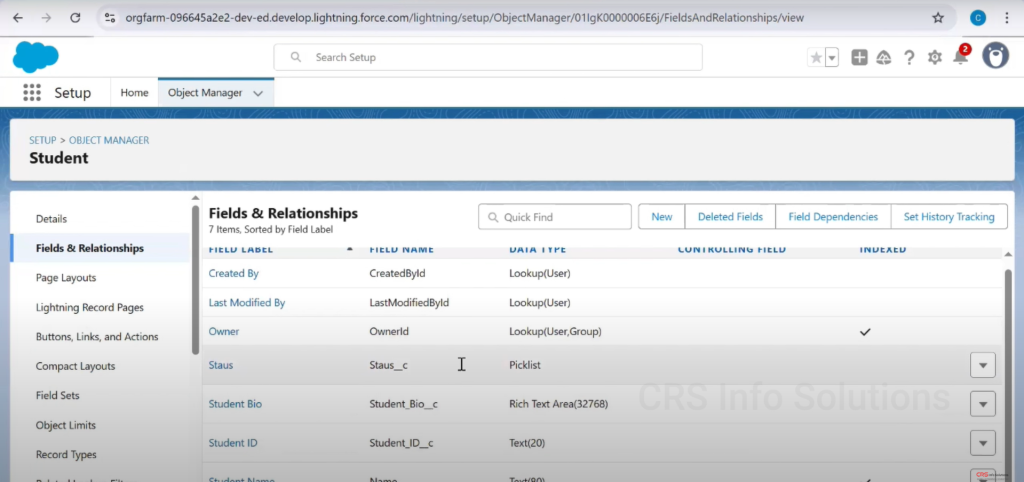
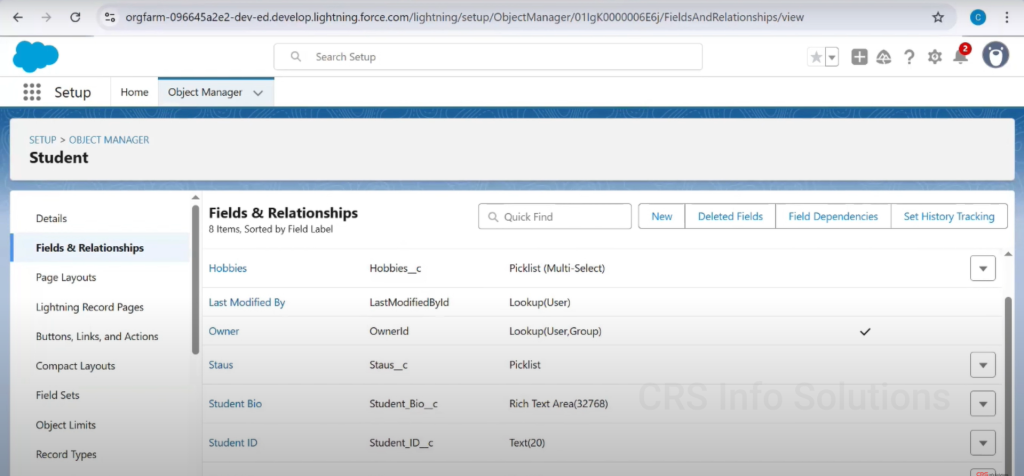
Field Appears in Fields List
After saving, we’re brought back to the Fields & Relationships list where the new field named Staus (note the typo in the label) now appears as a Picklist type.
This confirms that the field was successfully created and is now part of the Student object schema.
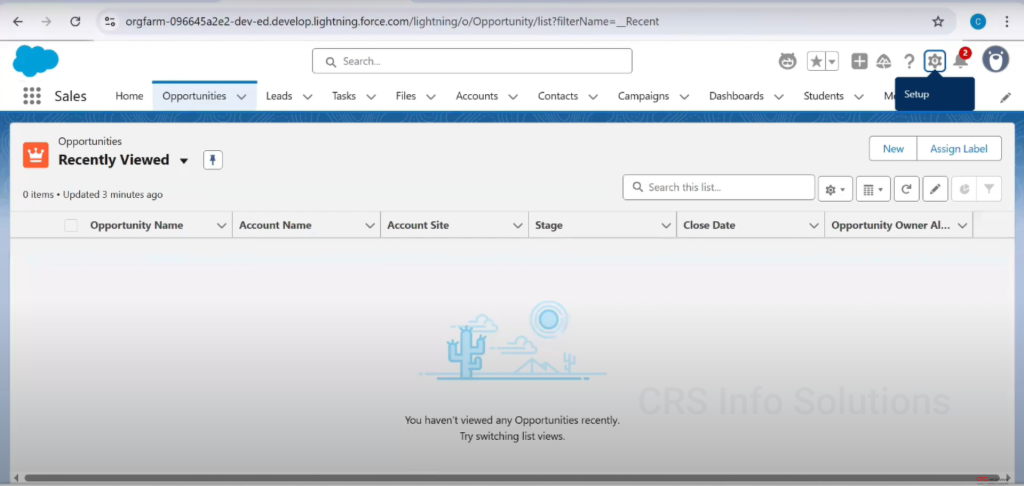
Accessing Setup from App View
From the app’s UI, we can navigate to Setup by clicking the gear icon at the top right. This allows Admins to make further field modifications if needed.
It also signals the transition from backend configuration to frontend verification.
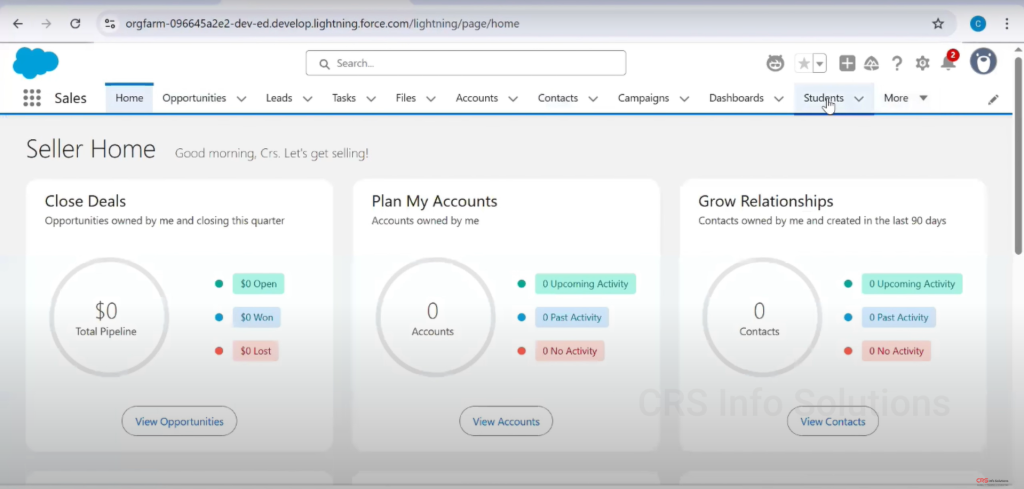
Navigating to Students Tab
Now we’re back on the Salesforce App UI, where you can access the Students object (custom tab) from the navigation bar. This is how users typically interact with object records.
We’ll use this path to verify the newly created Picklist field.
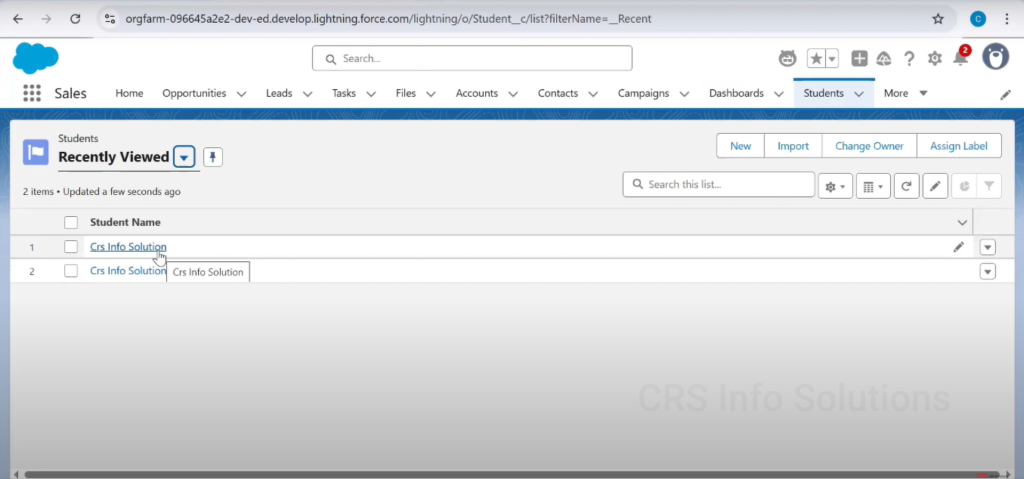
Viewing Student Records
This shows the Recently Viewed records of the Student object. Clicking on any record (e.g., Crs Info Solution) opens the detailed view of that student, allowing us to test the Picklist field in action.
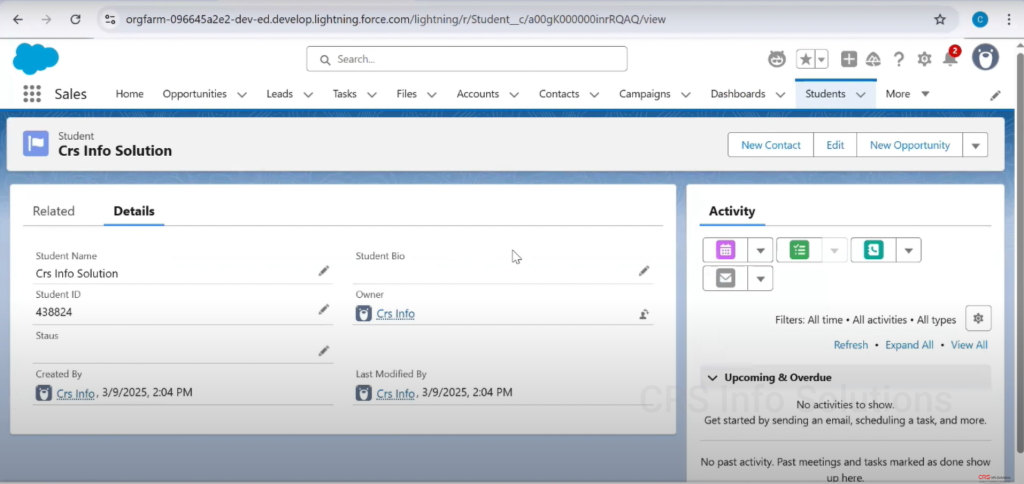
Record Detail View
Inside the selected student record, you can now see the Staus field displayed alongside other fields like Student Name, Student ID, and Owner.
This verifies that the field was correctly added to the page layout and is accessible from the UI.
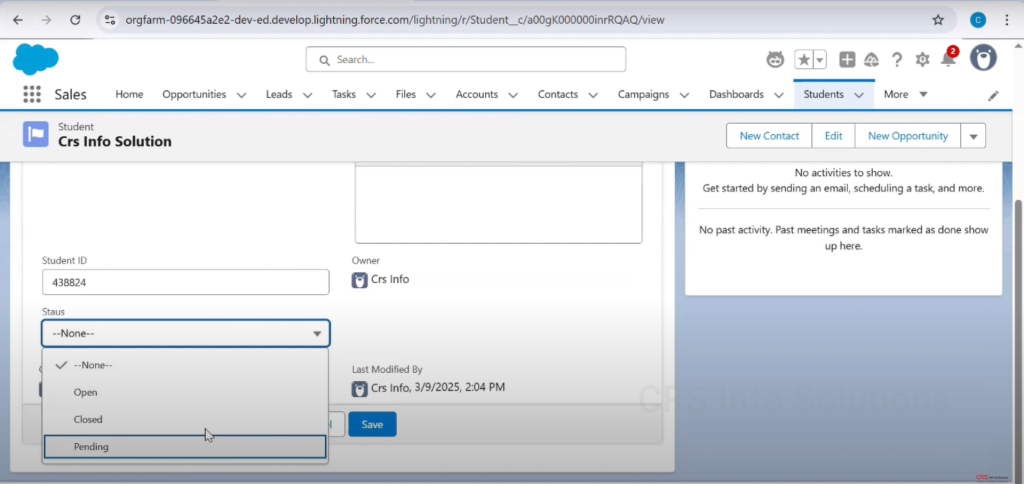
Editing the Picklist Field
This final image shows the dropdown options of the Staus Picklist field when editing a student record. The available options — Open, Closed, and Pending — match exactly what we entered during the setup.
Selecting a value and saving the record completes the cycle of creation, layout assignment, and frontend usage.
After understanding standard Picklists, it’s time to explore Multi-Select Picklists — a powerful tool in Salesforce for allowing users to choose multiple values. This section walks through the creation process using screenshots.
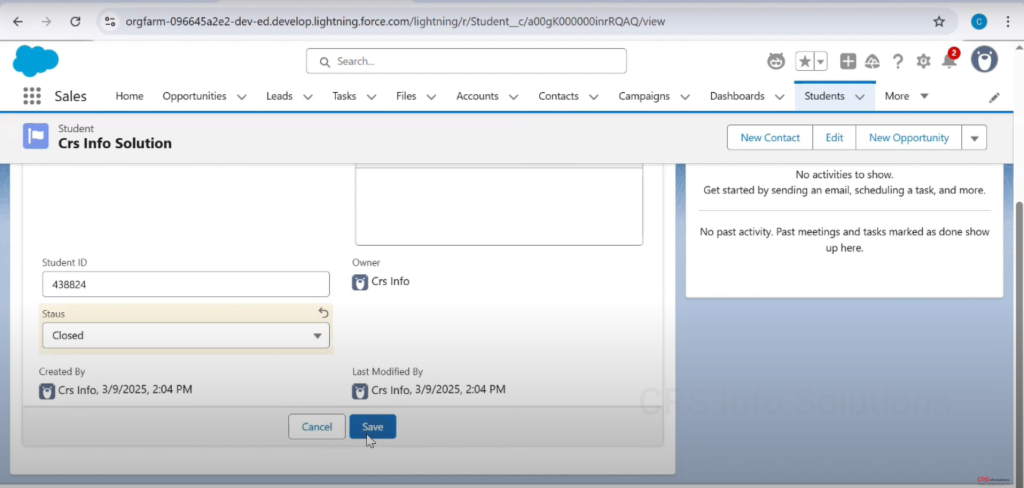
Editing a Record and Selecting a Picklist Value
In this screenshot, the user is updating the Status field of a Student record. This field is a Picklist, as shown by the dropdown arrow. The value “Closed” is selected, and the user is about to click the Save button.
- The Picklist field ensures standardized data entry by limiting the user to predefined values (e.g., Open, In Progress, Closed).
- This field helps maintain data consistency and enables efficient filtering and reporting.
- The Save action will commit this change to the Salesforce database.
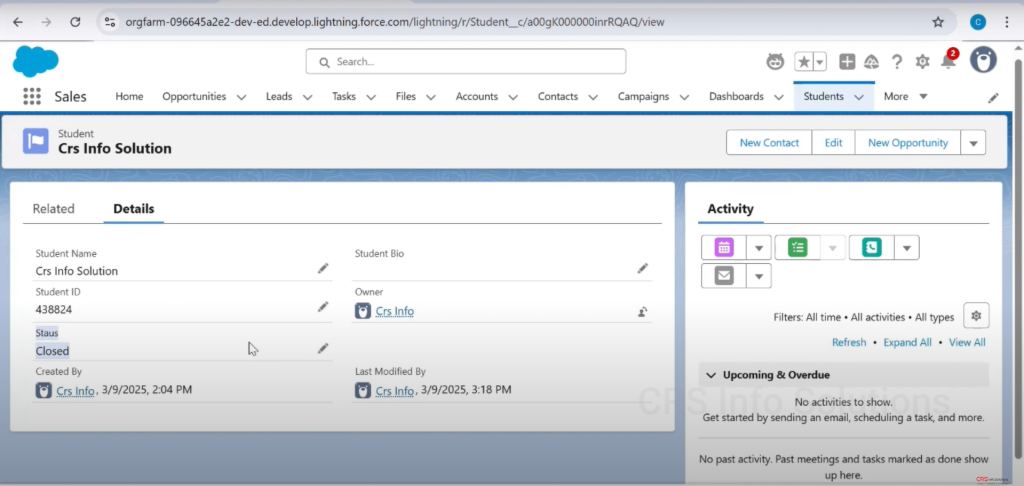
Status Field Displayed in Record Details
Here, the Status field that was edited in the previous image is now visible in the Details tab of the Student record. The selected value “Closed” is displayed.
- This shows how a Picklist field appears once the record is saved.
- Users can easily verify which status is set for a particular student.
- It reinforces the usefulness of Picklists in managing controlled data updates.
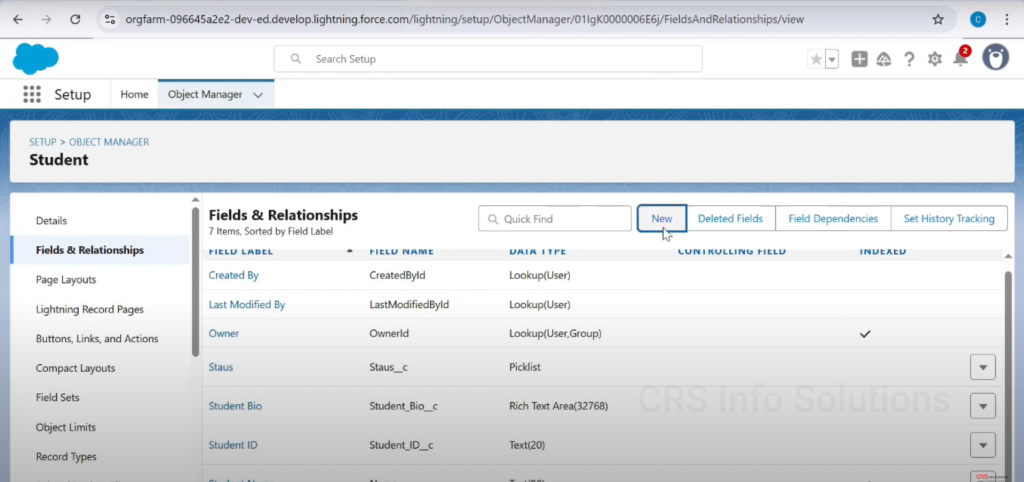
Fields & Relationships — Creating a New Field
This image shows the Fields & Relationships section of the Student object in Object Manager. The user is about to click the New button to create a new field.
- This is where all fields on a Salesforce object are listed, including custom and standard ones.
- Clicking “New” allows you to add a new custom field, such as a Picklist or Multi-Select Picklist.

Choose the Field Type
In this step, the user begins the field creation process by selecting a field type. This screen lists various data types available in Salesforce.
- To create a Picklist or Multi-Select Picklist, this is where you begin.
- You must first choose the appropriate field type depending on whether single or multiple selections are needed.
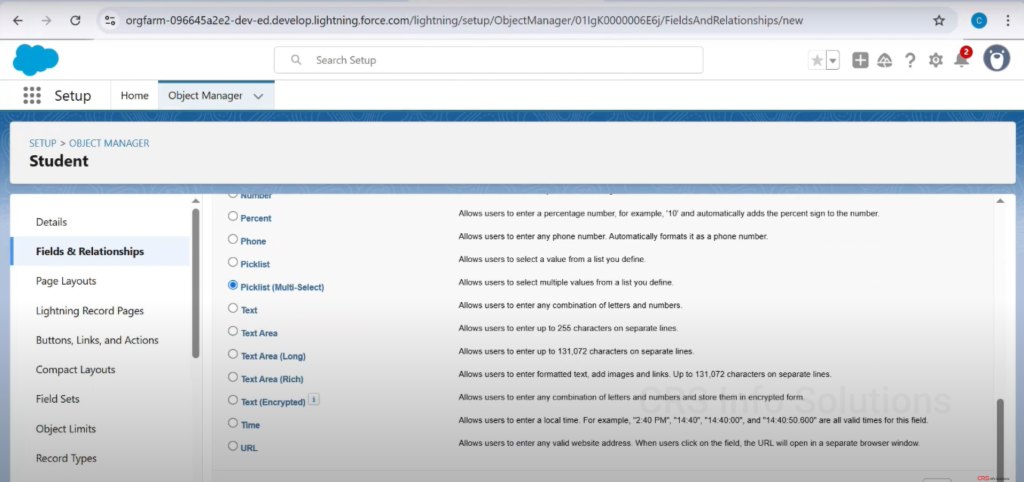
Selecting Picklist (Multi-Select) Field Type
In this screen, the user scrolls through the list of field types and selects Picklist (Multi-Select).
- A Picklist (Multi-Select) allows users to choose multiple values from a predefined list.
- This is ideal for scenarios where multiple categories or interests need to be tracked in one field (e.g., Preferred Courses: Admin, Developer, Marketing).
- Unlike standard Picklists, multi-select fields can store multiple values in a semicolon-separated list.
Field Types Explained on the Right Panel
This image shows the help text on the right that explains each field type. For Picklist (Multi-Select), it clarifies that users can select multiple values from a list you define.
- It’s always good practice to read this description before creating a field to ensure you select the best data type for your use case.
- Understanding how values are stored and displayed helps in configuring workflows, validation rules, and reports later.
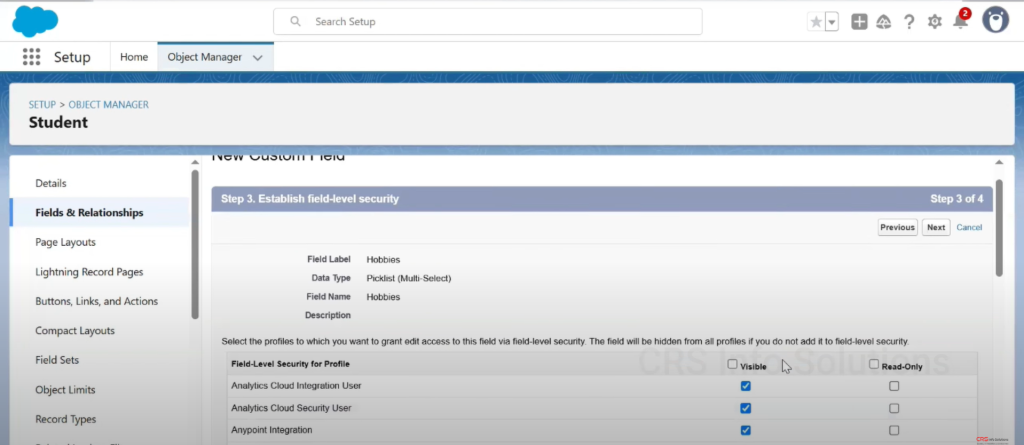
Setting Field-Level Security
After defining the field values, Salesforce asks which profiles can see or edit the new field. This Field-Level Security step is crucial for maintaining data protection. Here, the user grants visibility and edit access to all profiles by checking the relevant boxes.
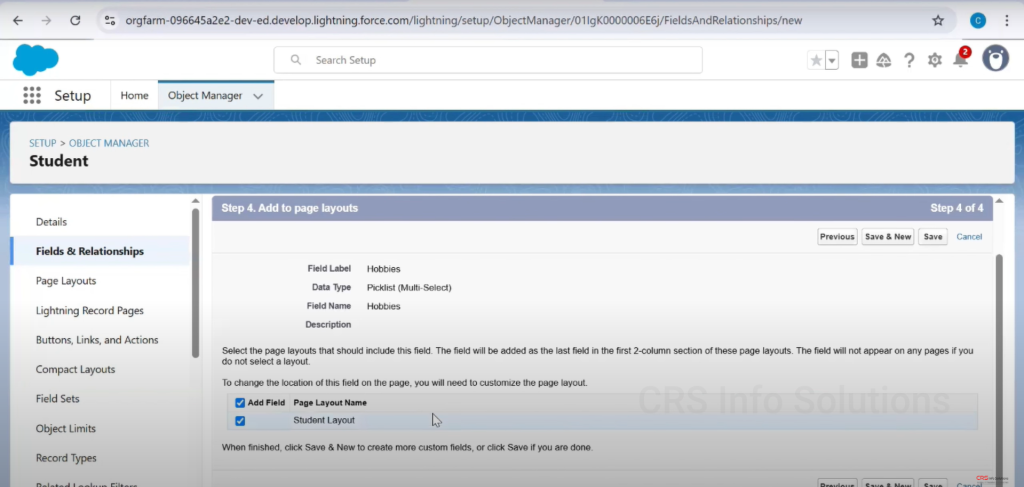
Adding Field to Page Layout
This image shows the Page Layout Assignment step, where the field is added to the appropriate layout for the Student object. This ensures users can interact with the new multi-select picklist on the record pages. The “Add Field” action guarantees it becomes visible on UI forms.
Confirmation of Field Creation
Once the field is added to the page layout, Salesforce shows a confirmation message. The field is now active and ready for use. This marks the successful creation of a multi-select picklist, and you can begin testing it on new or existing student records.
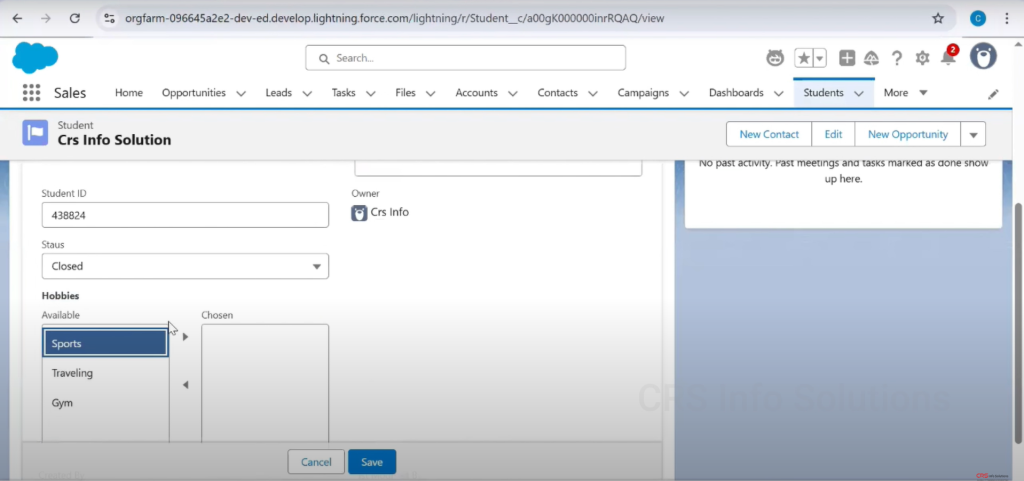
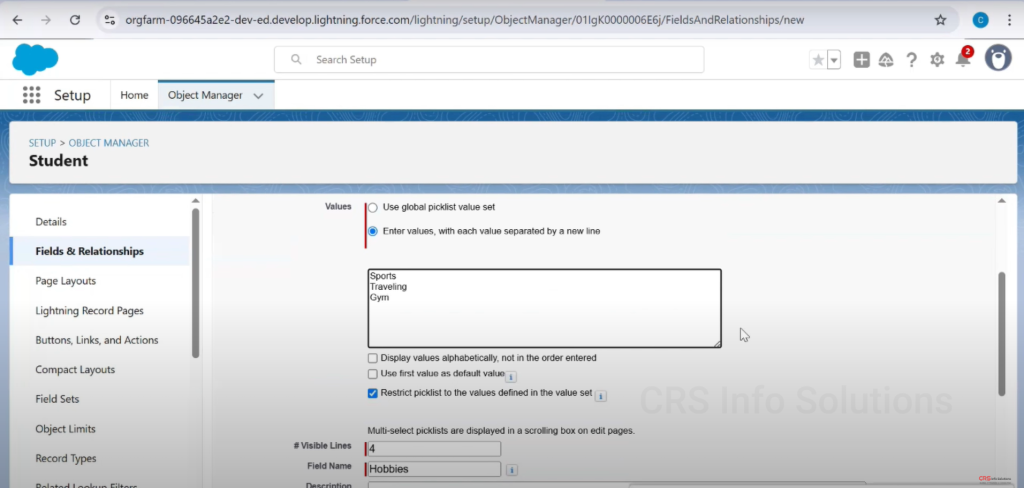
Selecting Values in Multi-Select Picklist Field
In this screenshot, the user is editing a Student record and interacting with the Hobbies field, which is a Picklist (Multi-Select). The left column shows available values: Sports, Traveling, and Gym. The user is selecting Sports to move it to the Chosen column.
- Multi-Select Picklists allow the selection of multiple values using arrow buttons.
- This field is ideal when more than one value applies to a single record (like hobbies, skills, interests).
- The user can select multiple options using Ctrl/Cmd+Click or by clicking items and moving them with arrows.
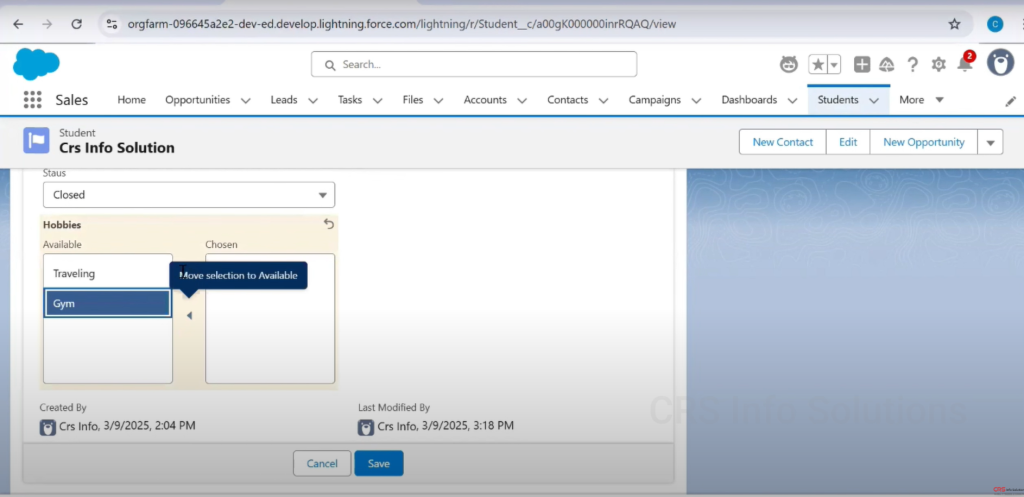
Rearranging or Removing Picklist Selections
Now the user has selected Gym from the chosen list and is hovering over the left arrow labeled “Move selection to Available.” This means the selected value will be removed from the chosen list and returned to the available options.
- Multi-Select Picklists offer full flexibility to add or remove values at any time before saving.
- This user interface ensures clarity and control when modifying multi-valued fields.
- The tooltip reinforces the action and improves usability.
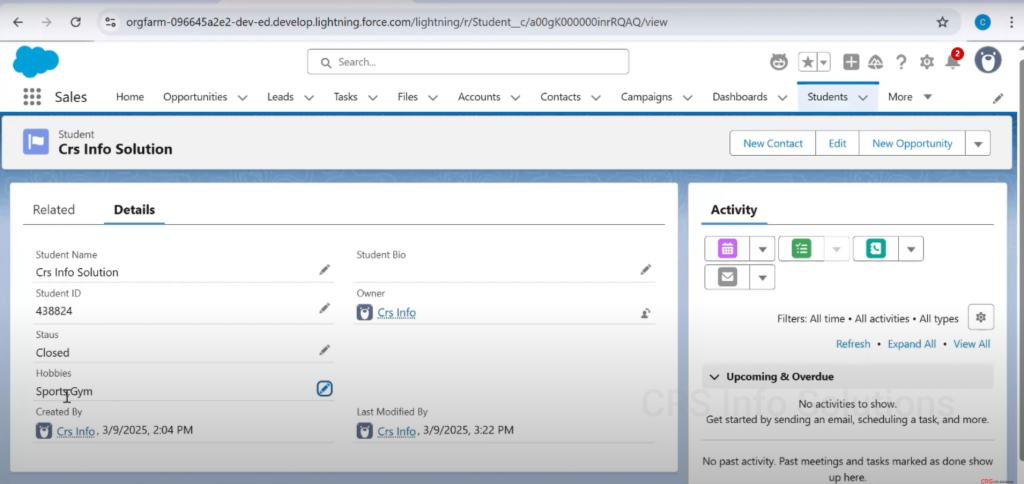
Viewing Saved Multi-Select Picklist Values
This final image shows the saved Hobbies field values in the Details tab of the Student record. The values “Sports; Gym” are displayed together without spaces between them.
- Salesforce stores multi-select values in a semicolon-separated string format.
- While it works for data processing and automation, UI presentation may vary depending on customizations.
- Developers can manipulate this format using formulas, validation rules, or Apex if needed.
This concludes the end-to-end demonstration of how to create, configure, and use Picklist and Multi-Select Picklist fields in Salesforce.
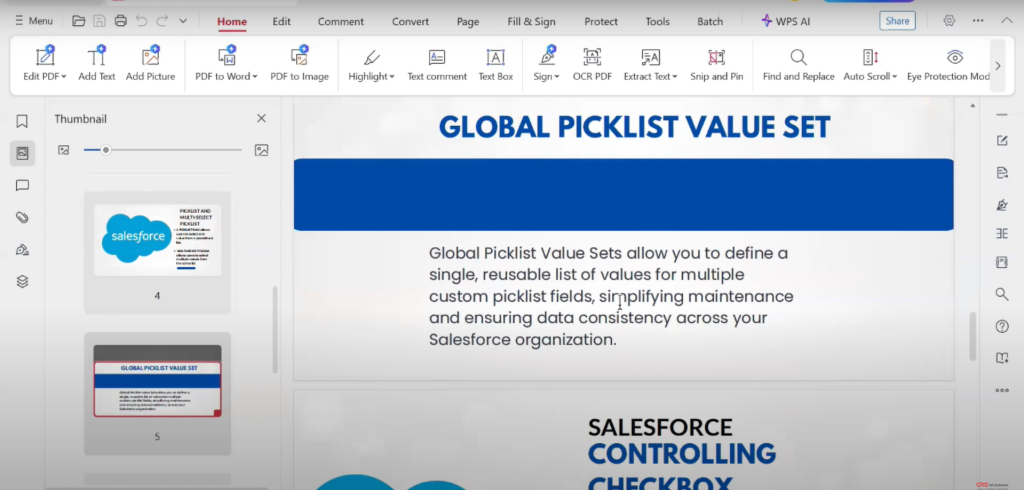
Introduction to Global Picklist Value Set
This slide provides a textual overview of one of the most powerful tools for managing picklist values efficiently in Salesforce — Global Picklist Value Sets.
A Global Picklist Value Set allows you to create a centralized, reusable list of picklist values that can be used across multiple custom picklist fields in your Salesforce org.
Key Benefits:
- Centralized Management — Update values in one place and have them reflected wherever the picklist is used.
- Data Consistency — Ensures that multiple teams and processes refer to the same standard list of values.
- Reduced Errors — Avoids duplication and inconsistency in picklist values across objects.
- Simplifies Maintenance — Instead of editing values field-by-field, you manage them once at the global level.
💡 Use Case Example:
If multiple objects like Student, Course, and Enrollment need to use the same picklist values for “Status” or “Department,” a Global Picklist is the best solution. This is particularly helpful in large implementations and managed packages.
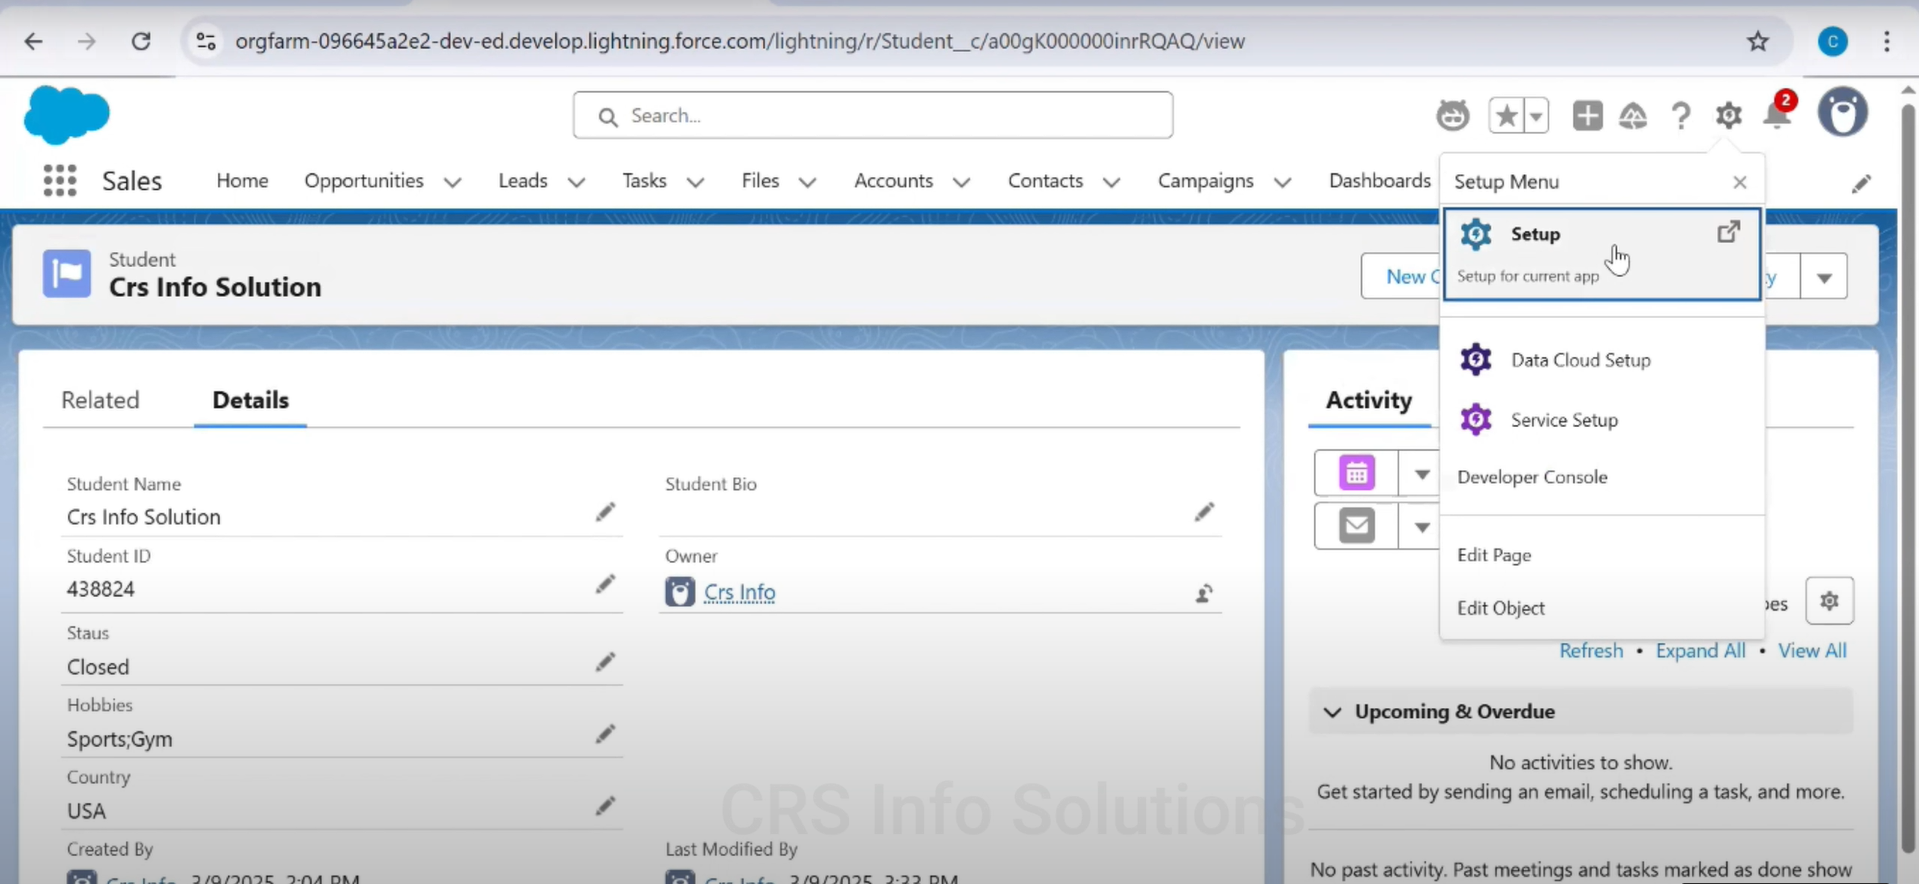
Accessing Salesforce Setup Menu
To create a Global Picklist Value Set, we first need to access Salesforce’s Setup area. In this screenshot, we’re inside a Student record and have clicked on the gear icon at the top right, which opens the Setup Menu.
From here, we click on the first option labeled “Setup”. This redirects us to the admin panel, where we can configure various Salesforce features, including Picklists and Value Sets. It’s important to always start from the correct setup area to access object-level and global configuration tools.
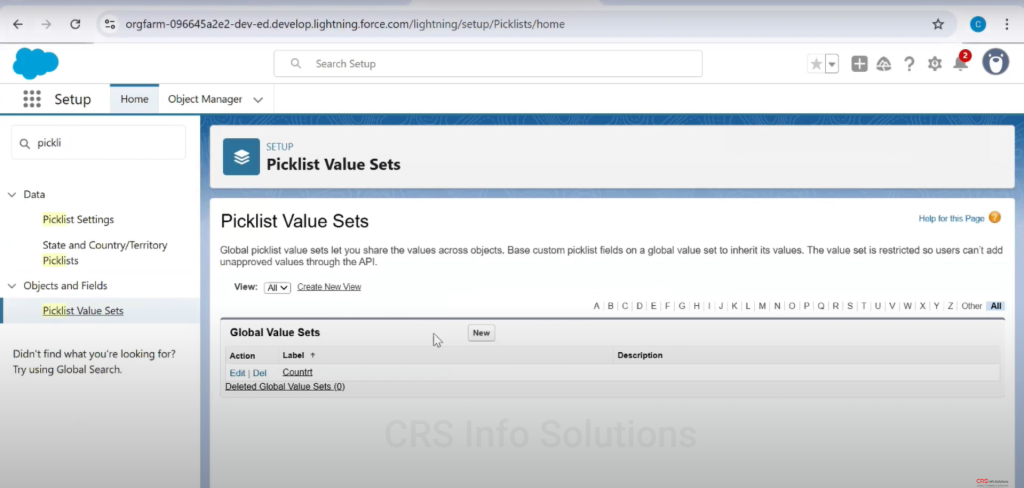
Navigating to Picklist Value Sets
Once in the Setup screen, we use the Quick Find search box (top-left) to type in the keyword “picklist.” Under “Objects and Fields,” we find the option Picklist Value Sets.
This screen shows us all the Global Value Sets available in our org. These are reusable sets of picklist values that can be assigned to multiple picklist fields across different objects, ensuring standardization and reducing redundancy.
To create a new Global Value Set, we click the “New” button on the right.
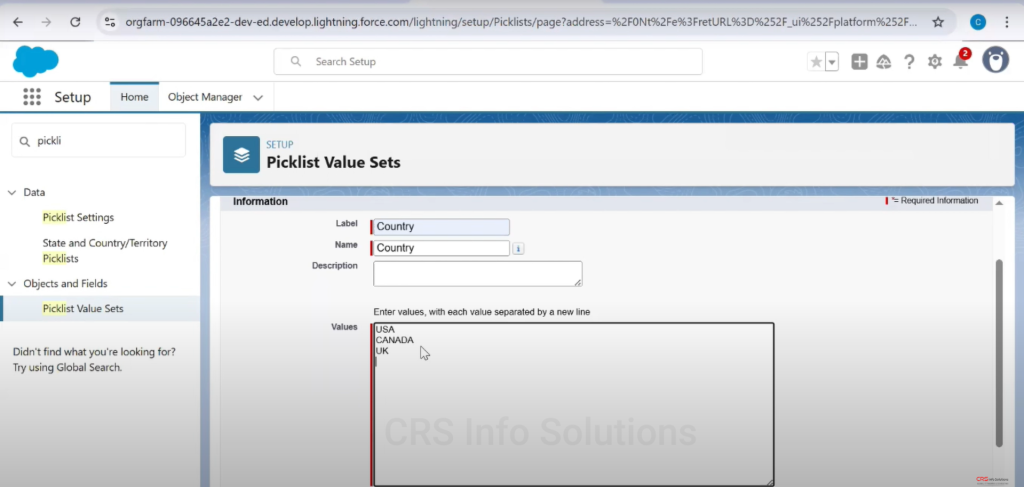
Creating a New Global Picklist Value Set
In this screenshot, we are in the process of creating a new Global Picklist Value Set.
- The Label and Name fields are set to Country.
- Below that, in the Values text box, we list out each country (USA, CANADA, UK) on a new line. Each line represents one picklist value that will be available in this set.
This screen allows admins to easily configure a consistent set of values that can later be linked with custom picklist fields across multiple objects.
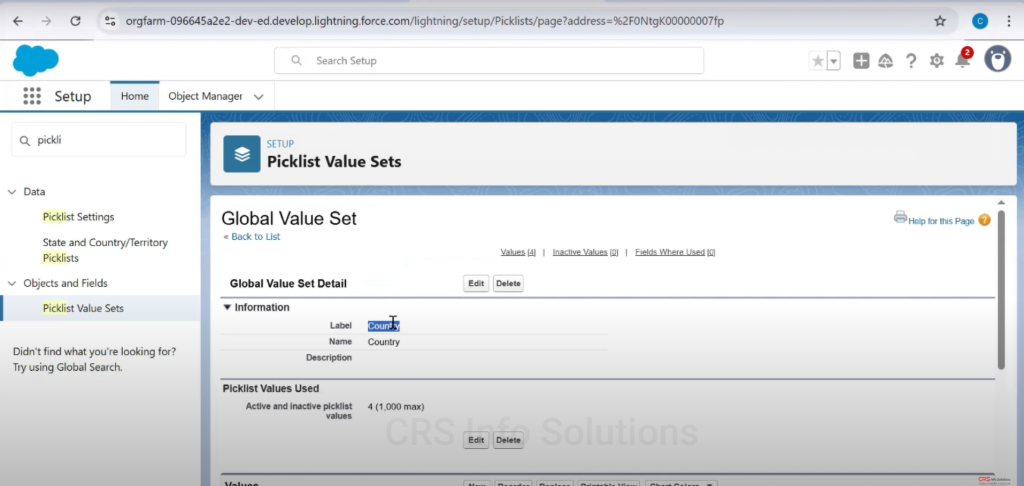
Viewing the Created Global Value Set
After saving, we are redirected to the detail view of our newly created Global Value Set titled “Country.”
Here, we can:
- Edit or delete the entire value set.
- View or manage the individual values (currently 4 active).
- See where this value set is being used via the “Fields Where Used” link (currently 0, as we haven’t linked it yet).
This centralized control allows us to efficiently manage options for multiple picklist fields using one value set, ensuring data integrity and minimizing admin effort.
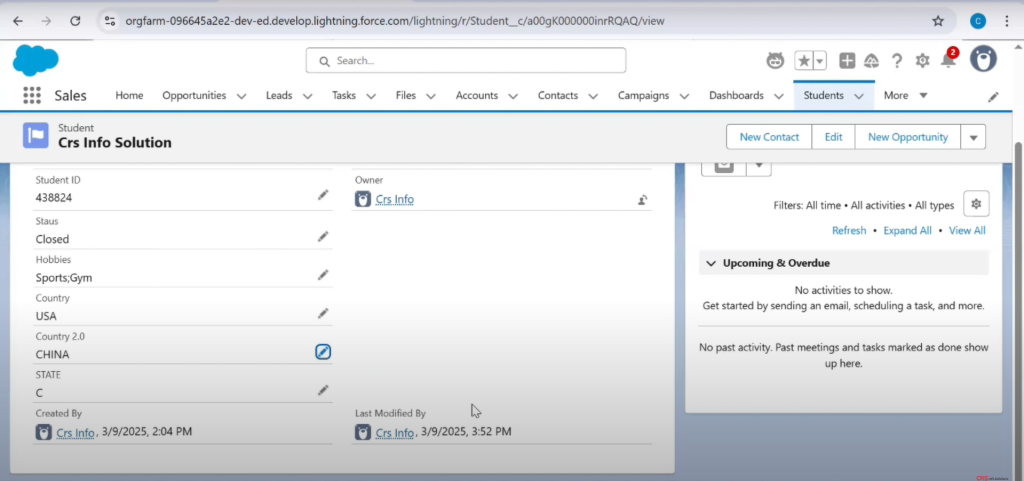
Global Picklist Value Displayed on the Record
Finally, we return to the Student record view, where we can now see the new Global Picklist values in action.
In this example:
- There are two different country fields displayed: one standard and one custom (likely “Country 2.0”) created using the global value set.
- “Country 2.0” displays the value “CHINA,” indicating that the field is using values from the Global Picklist set we created.
This confirms that the Global Picklist is working as expected and ensures that future changes to values can be managed globally without touching each object individually.
✅ Final Thoughts
Using Global Picklist Value Sets in Salesforce is a powerful way to enforce consistency, streamline maintenance, and reduce data entry errors. They are especially useful in large orgs where multiple objects use the same categories (like country, region, industry, etc.).
By following this tutorial with screenshots:
- You’ve seen how to access setup,
- Create a global value set,
- Add picklist values
- View its usage,
- And validate its application on a record.
Conclusion
In this tutorial, we walked step-by-step through the process of creating and using Global Picklist Value Sets in Salesforce — from navigating to Setup, defining the value set, and finally applying it to custom fields.
This feature is essential for maintaining data consistency, reducing admin overhead, and ensuring a standardized user experience across objects. Whether you’re managing countries, regions, product types, or categories, using global value sets helps streamline your Salesforce implementation.
By leveraging this reusable feature:
- You gain centralized control over picklist values,
- Ensure uniform options across multiple objects,
- And save time when updating or expanding your options.
If you’re a Salesforce Admin or aspiring to become one, mastering Global Picklists is a valuable skill that adds both efficiency and professionalism to your org setup.
Start standardizing your data today — and make Salesforce work smarter, not harder!

